
How to build a BSP 'Saunders' Saloon chassis
To build the kit you will need: .032 wire, .047 wire, .032id brass tube, .032id thin wall brass tube or .032 id stainless steel tubing. Building of any slot car chassis requires care. Please ensure that you wear protective eye glasses and only use tools in the recommend way. Soldering should be done in a well ventilated area. Recommended in the build of this chassis are BSP 'licky' brians flux, Hakko Soldering iron and Toro for cleaning the chassis.
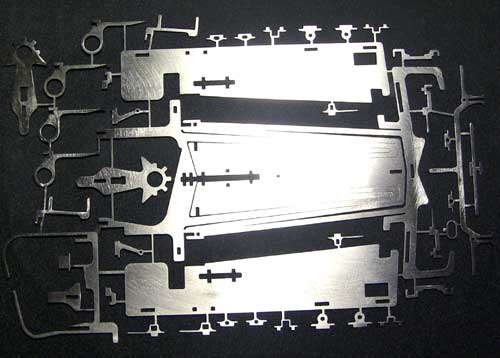
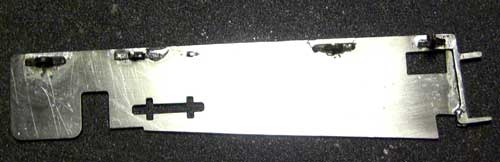
The kit of parts should look like this. clean up all the slots and then remove the parts carefully from the sprew. Keep them safe!
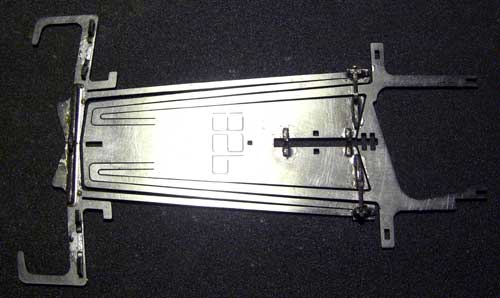
The side rails need to be cut away where the tags are holding them to the motor box. Once you have done this make sure the centre section is VERY flat. Bend and tweak if needed. The side rails need to spaced away from the motor box rails.
Some parts will be left over and are spares or used to tune the chassis. You have 2 types of pan stops (standard are the wide ones), and 2 guide plate length ( I used the longer one at the Nats).
Insert and solder in place the front hinge
mount and up-stops into the front bumper, and also the guide stop. Attach the side rails (using the parts located at the front of the chassis kit), and also the 'hooks' (located at the end on the pan) and solder securely. Make sure the chassis is still flat at this stage. Put in the spine hinge pieces (1.2mm round hole), after you have made sure the wire will pass through them.
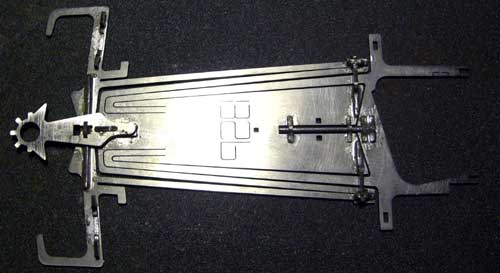
The centre spine is made up using .047 wire (1.2mm), and 4 eyelets. I use 2 round ones in the centre section and a round one and an oval in the motor box (this leaves a spare of each type). Ensure the wire can rotate before you solder them in. Once in place and the wire and motor box eyelets are soldered check the spine wire is level.
Attach the guide (Long one is at the back of the kit, shorter one in the motor box area) and spacer using the interlocking 'T' piece. Ensure it is level and moves left to right equally and smoothly.
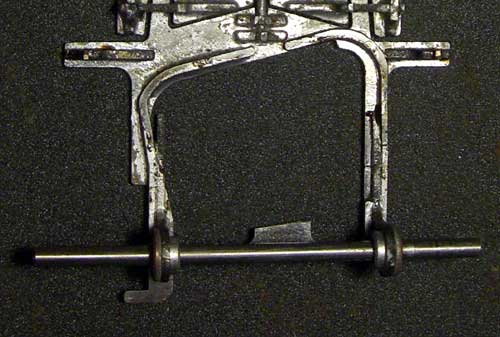
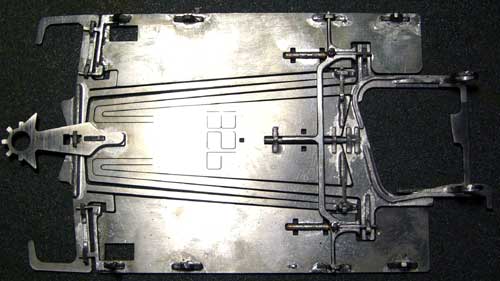
The next part is the build up the rear end. I have used a pair of oilites to ensure the pillow blocks are upright. Set the height using a pair of NEW gears.
Also attach the pan up/down stops either side of the motor box. The one on the right will need the 'leg' shortened. Make sure they are pushed down hard when soldered in place.
Build up the pans completely using the parts provided. The front pin tube holders have the larger hole (1.6mm), the rears are 1.2mm.
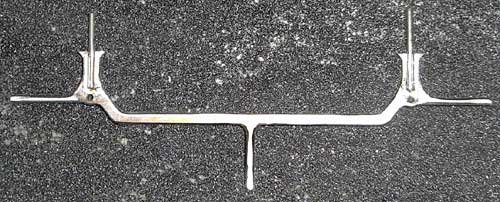
Make up the cross bar on a flat block, inserting 2 pieces of .032 piano wire. These need to be flat and level.
This next stage is VERY important to get right.
Attach the pans, and lay the cross bar in position. The cross bar should sit level on the 2 pans stops, and the spine. Check this before the pans interfere with the cross bar. The pans should slide over the cross bar. When the pans are held down flat, it should not be possible to lift the motor box. When pushing down on the left pan, the right pan should not lift and vice versa. Tweak the cross bar/pans stops until it is correct.
The hinges are .032 tubing. Bend a piece of .032 wire at 90' creating a 'L' and make the hinge. Insert this from under the chassis, sliding the wire through the hole in the cross bar.
Solder the tubes to the pans. Ensure the wires can still move in the tubes and then solder the wires to the cross bar. I use an additional piece of tube on the top to reinforce this joint.
With the cross bar attached, give the chassis a very good scrub using the TORO, or similar. Add the centre cross bar stop (there are 2 in the kit in case you break one) and the lead wire retainer.
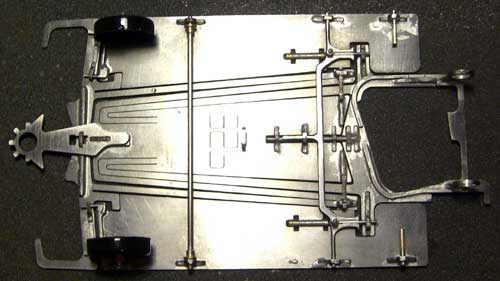
Pintubes at the rear are Stainless or thin wall brass. The front tube is either standard pintube, or stainless (to give a rattler) as shown here.
Using a pin, attach the front wheels. I have used the Lexan BSP lite wheels.
Recommended set up is: Proslot or Koford Ultra C-can with a Recek balanced Proslot or Koford X12 Armature, with around 7/41 gearing, BSP tyres and CAT 307 bodyshell.